How to Make a Technical Blog
(with absolutely no Jekyll experience)
25 Jul 2023Initial Setup
- Fork the Hyde Repository (or my repo).
- On your new Github Repository: navigate to to Settings>Code and Automation>Pages.
- Build and deploy a Github Page from the main branch & Save.
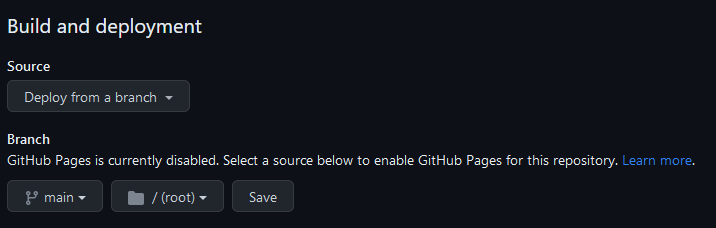
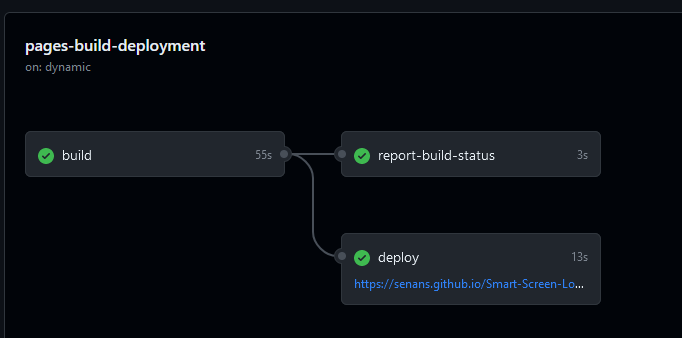
- In the Actions tab of the repo, you can view the status of the deployed page & debug if there are any issues.
Local Testing
If you want to develop/debug the site locally:
- Clone your newly created fork to your local machine.
- Install Jekyll for your OS.
To build, host & deploy the site in the local repo directory use:
jekyll serve
In case that didn’t work properly
You may encounter some _config.yml errors using:
markdown: redcarpet- Change to
markdown: kramdown
- Change to
highlighter: pygments- Change to
highlighter: Rouge
- Change to
relative_permalinks: true- Change to
relative_permalinks: false
- Change to
- Adding
plugins: [jekyll-paginate] - I also experienced issues with the addresses in the
head.html, with the CSS links!
- This was fixed by adding or removing a / before
publicin the URL.
- This was fixed by adding or removing a / before
Customisation
With the local copy working, you can customise the /_includes, /_layouts, /_posts, _config.yml, /public, atom.xml, 404.html, about.md & index.html pages, but not the /_site directory, as this will be overwritten with each build of the Jekyll service.
Adding Articles
Posts are added within the _posts directory, named specifically in the YYYY-MM-DD-title format.
Kramdown markdown is used to format the posts.
All written markdown articles should have some variation on the following header, called a Front Matter in Jekyll:
---

layout: post

title: How to Make a Technical Blog

---
Then start writing your markdown articles and documenting your adventures. Thanks for joining me 😊